
.png)


We’ve all heard it - the best way to grow on Instagram today is with Reels. It’s true. Updates to Instagram’s algorithm in 2022 are rewarding creators who create and post Reels.
Today, it’s the fastest way to grow your followers and put your content in front of new audiences on Instagram.
But how do you make one? And more importantly, how do you create a Reel that the algorithm likes?
Reels take time, patience, and effort. But don’t worry, we break down the exact steps you can take to create engaging Reels that pack a punch.
Let’s talk Instagram Reels
Reels can be a time-length of 15 seconds, 30 seconds, and 60 seconds. You can add music, captions, graphics, voiceovers, green screen backgrounds and more.
Unlike Instagram Stories, Reels are permanent and featured on your profile. Reels can also be shared broadly through the Explore page – A massive opportunity for any creator.
How the Reels Algorithm Works
Instagram is pretty transparent about how the platform algorithm treats Reels and other video on its platform. Here’s a great breakdown, but if you’re too exhausted to pull up another article (we get it), we pulled out a few do’s and don’ts:
- DO - Engage with comments, DMs, and tags. The algo weights a users overall engagement with content and other creators.
- DO - Use shareable sound clips. Instagram favors videos with sound clips used by other trending creators.
- DO - Engage the viewer until the end of the video. Watch ‘till the end = viral.
The Don’ts:
- DON’T - Use low resolution, copyrighted, or watermarked video.
- DON’T - Create videos with political content. If that makes you mad, maybe Instagram isn’t your platform.
- DON’T - Go R-rated. PG or PG-13 is what trends.
Remember, the algorithm acts as guardrails for the platform. You don’t need to treat them as hard and fast rules, but with any artistic medium, constraints can be helpful. As you create more Reels, you’ll discover which constraints you can break, and which to leave intact.
The Creator HQ
Join thousands of creators and build landing pages, grow your audience, and get paid on your terms, all in one place.
Creating your First Reel
1. Have a plan for your content
Planning for Reels is the fun part – you get to enjoy other people's content. A great place to find inspiration and content ideas: hashtags.
Create a short list of hashtags you want your own Reels to trend in. Note which Reels are getting the most engagement. We recommend saving those Reels into a folder by clicking the “save” icon on the video and setting up an “Inspiration” folder.
2. Pre-record your video using a camera or film directly in Reels
After you’ve decided which type of content you want to create, it’s time to make your first Reel. Not surprisingly, there’s a few ways you can go about recording a Reel, either in the Instagram app, or in your camera app.
Pro Tip: Unless you plan on using a filter, we recommend recording in your camera app. This way, you can avoid the pain of losing all your work because of the Instagram app crashing. Been there, cried about it.
Create a Reel in Instagram
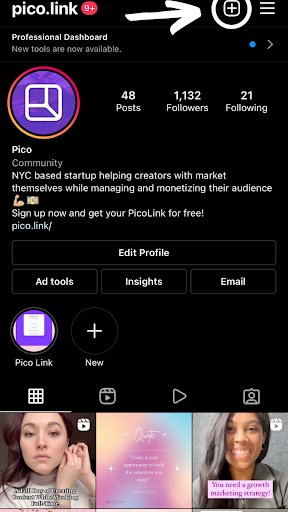
First, click on the plus sign located at the top of your screen. Make sure that you click “Reel.” You can also click the Reels button at the bottom of the screen and then click the camera icon at the top right (see image below).
Then, indicate whether your video will be 15, 30, or 60 seconds long.
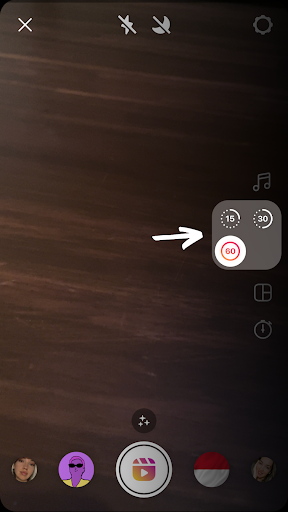
Afterwards, upload your pre-recorded video or record your video by pressing the middle record button. If you want to record your video directly in Reels and are recording yourself, you can use the hands-free option, click the Timer icon and set the timer for 3 seconds.

Importing a Reel from your Camera Roll to Instagram
If you want to import a video from your Photos, you'll have your Camera Roll located at the bottom left side of your screen with a plus sign on it. You’ll be able to add as many clips as you want that add up to the allotted time that you’ve chosen for your Reel.
3. Edit your content (add transitions, captions, graphics, get creative!)
When editing your content, you want to consider a few things:
- Do you want to add music?
- How about sound effects?
- Do you want to add voice over?
Regardless of how you answer, you need audio. Remember the algorithm? It likes audio.

Add Saved Audio or Music
You’re going to want to hit the music icon located to the right of the screen. And remember that research that you did in step 1? If you saved audio, you can go ahead and click on “Saved” and add audio from Reels that were in your inspiration list.
Search for Audio or Music
You can also import music or search for songs that fit the vibe of your Reel. The cool thing about the music feature in Reels is that the app starts to learn the type of music that you add to your Reels. Eventually it will suggest songs that you like, and choosing a song becomes automatic.
Add a Voiceover
If you want to add a voiceover, you’ll have to make sure that you’re in preview mode by clicking on the “next” button, then hit that music icon again at the top of the screen. Here, you can change the volume of the music that you chose, add voice overs to any part of your Reel, and/or add sound effects by choosing from their list and you can always adjust the sound on any of these options.
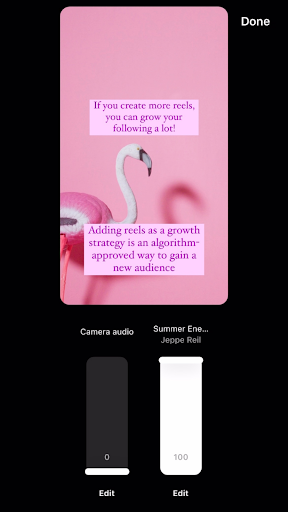
For example, if you’re doing a voice over but you want to add music too, you might want to adjust the music volume to 10 and have your Voiceover at 100. Make sure that your camera audio is adjusted to 0 so that there’s no feedback from your camera audio.
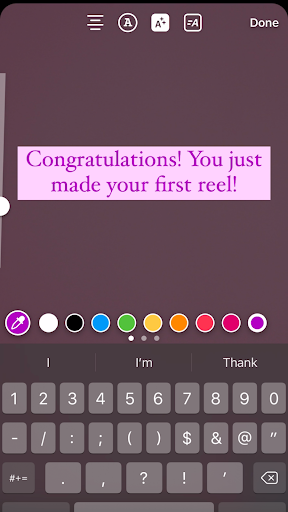
Add Text to your Reel
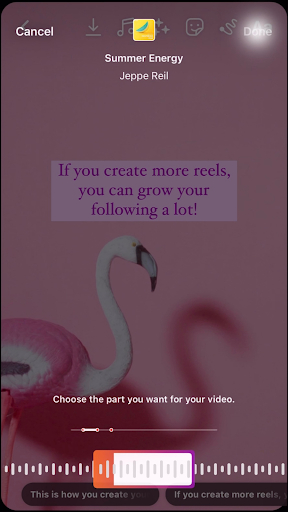
Now that you’ve added the music, it’s time to decide whether or not you want to add text. This is the part that can be tricky. We recommend adding all of the text that you want first and then adjusting the time stamps.
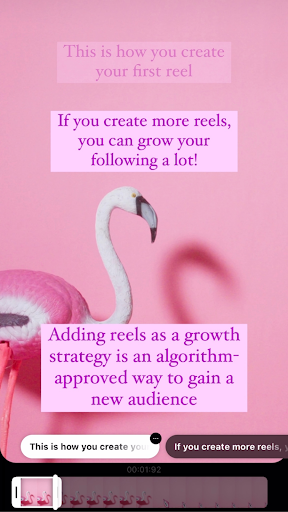
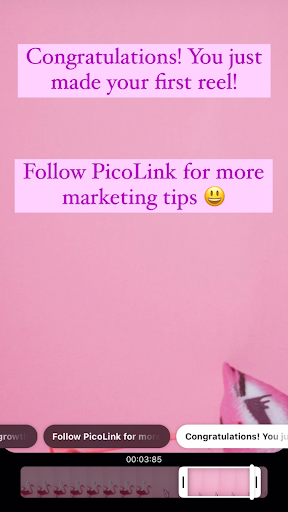
To do this, you’ll want to tap the “Aa” icon. You can add separate lines of text, and you’ll start to see them populate in a horizontal list at the bottom of the screen. When you click on each text, you’ll see the time frame in which the text shows up in the video.
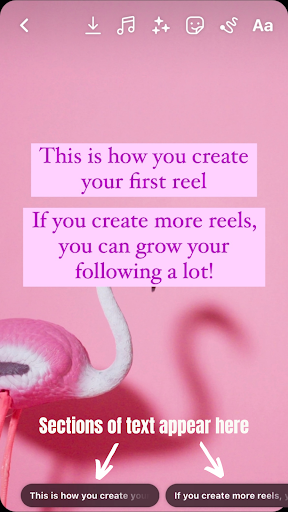
By default, all text appears throughout the entire video, so click on each text and slide over the time bar to have the text show up in the time frame that you want. Make sure that by now, you have also moved the text to wherever you want to be in the video, and you’re golden.
Posting your first Reel
By now, you have your video, carefully curated audio, and text in your Reel. Other things that you can do during this step is: add captions by clicking the post-it note guy with the smiley face and then clicking “Captions.” You can also add GIFs or images and, just like the captions, you can choose the time segment that you want these adornments to show up. Another thing that you can add at this point is filters, but you cannot choose the time segment that you’d like it to appear, so make sure that it’s a filter suitable for the entire video. Additionally, you can add drawings, but once again, you cannot allocate a certain time frame to that feature.
Preview your content
Make sure that your video looks exactly the way that you want it to before you proceed to your caption. You should be looking out for whether or not the timing is appropriate, if there are any grammar mistakes, and if the audio matches the content.
Create an interesting caption
Just like any other Instagram post, your captions should be enticing. The best thing to do is to add a Call-to-Action in your video, but also in the captions. A “Call-to-Action” is a marketing term that refers to any sort of action or response that you are trying to elicit from your viewers. This can be something as simple as “like this post” or “follow me for more!”
Add effective hashtags
Ok, so here’s the thing: You can’t just create Reels and expect others to see it without adding hashtags unless you’re only sharing the Reel with your current followers. The only way that creators show up in the Reels section on Instagram is through the use of effective hashtags. Use your research from step 1 to use the right hashtags and gain traction on your Reel.
Et voila! You did it! You’ve just made your first Reel. We hope we helped to make it a painless attempt. The best advice that we can give you is: keep making them. Do a Reels challenge and try to create 3-4 Reels a week. The Instagram algorithm and your followers would love you for it.


